The Goodman Zone
For awhile my brother-in-law had been motivating me to get into photography. I struggled because I wasn’t willing to commit and spend more than $100 as I’m a ruthless penny-pincher. When I heard about Dora Goodman’s fancy new 3D printable camera on r/functionalprint, I spent probably three times that in a heartbeat. Going in I knew hardly anything about photography, so what better way to learn than building a camera from scratch?
If you make an account on her site you can go to your profile and find the STL files along with a parts list in a Google doc. I won’t share these with you here since I think she wants to keep it behind her community.
The Pieces
I live in the States, so it’s a little bit more difficult (and expensive!) to come by the metric parts required to build this thing. So I’ll make your life easy and give you a list of items you’ll need off Amazon:
- M3, M4, M5 screws
- Kit including M3’s that are long enough
- Long M3 set screws
- Adapters to connect your camera to a tripod
- 2mm thick light seal foam (I actually used 1mm and ended up having to stack it)
- Some small set screws
- Shutter release
- 400 grain Sandpaper
- (Optional) Walnut veneer
- (Optional) Wood stain
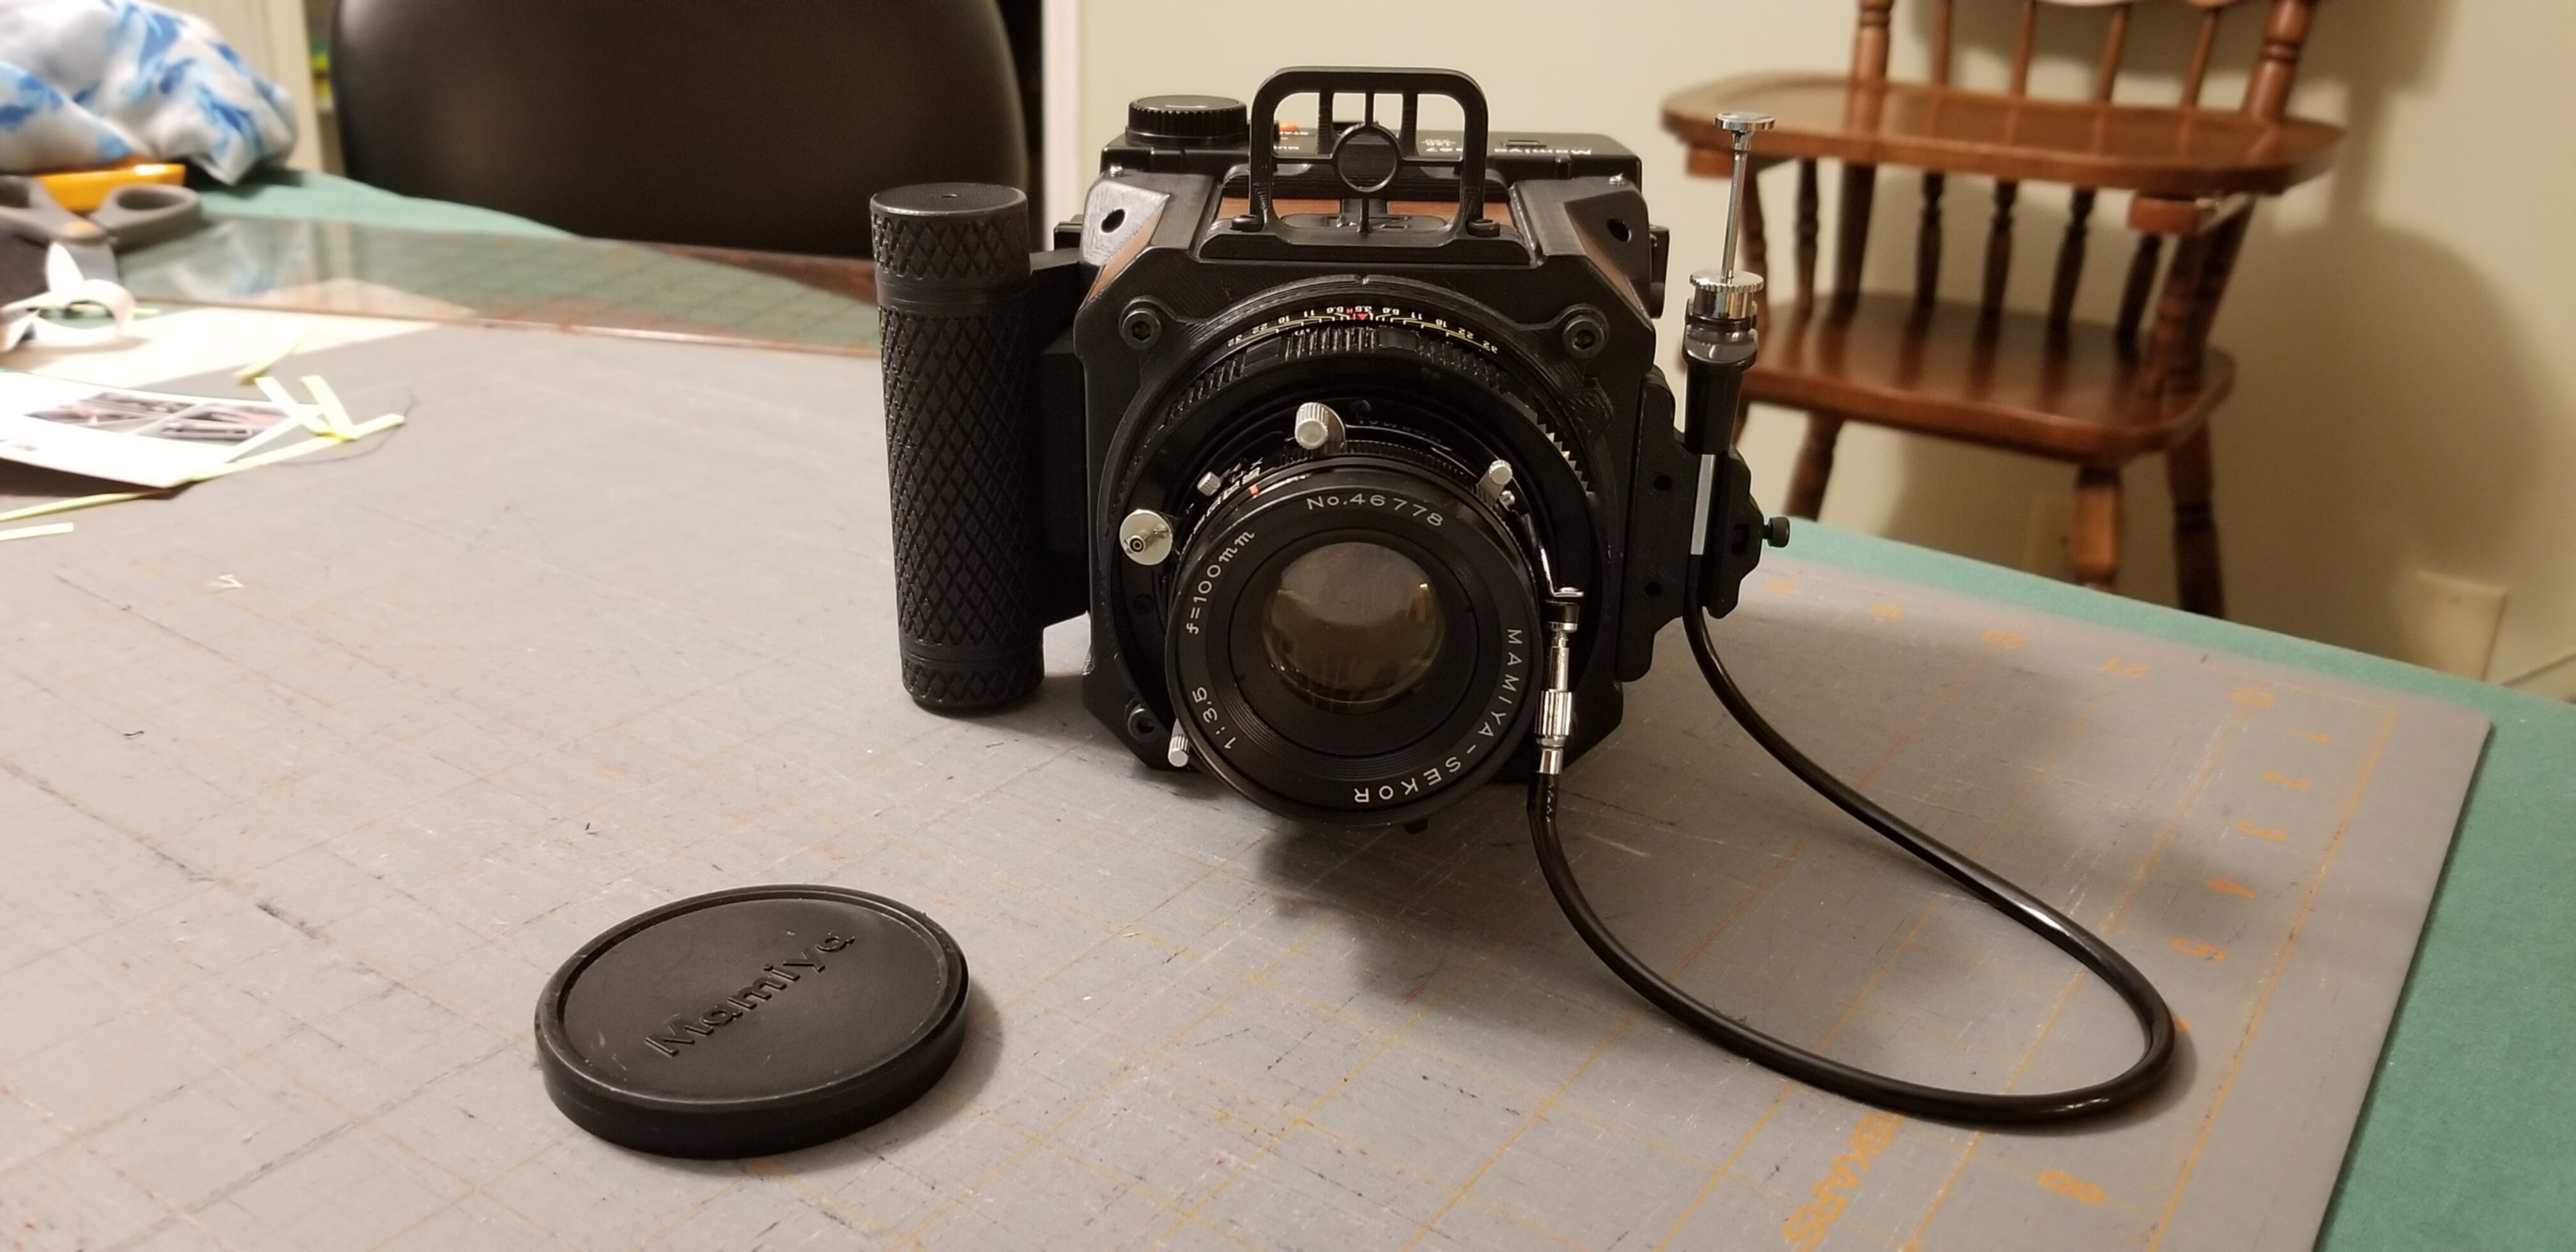
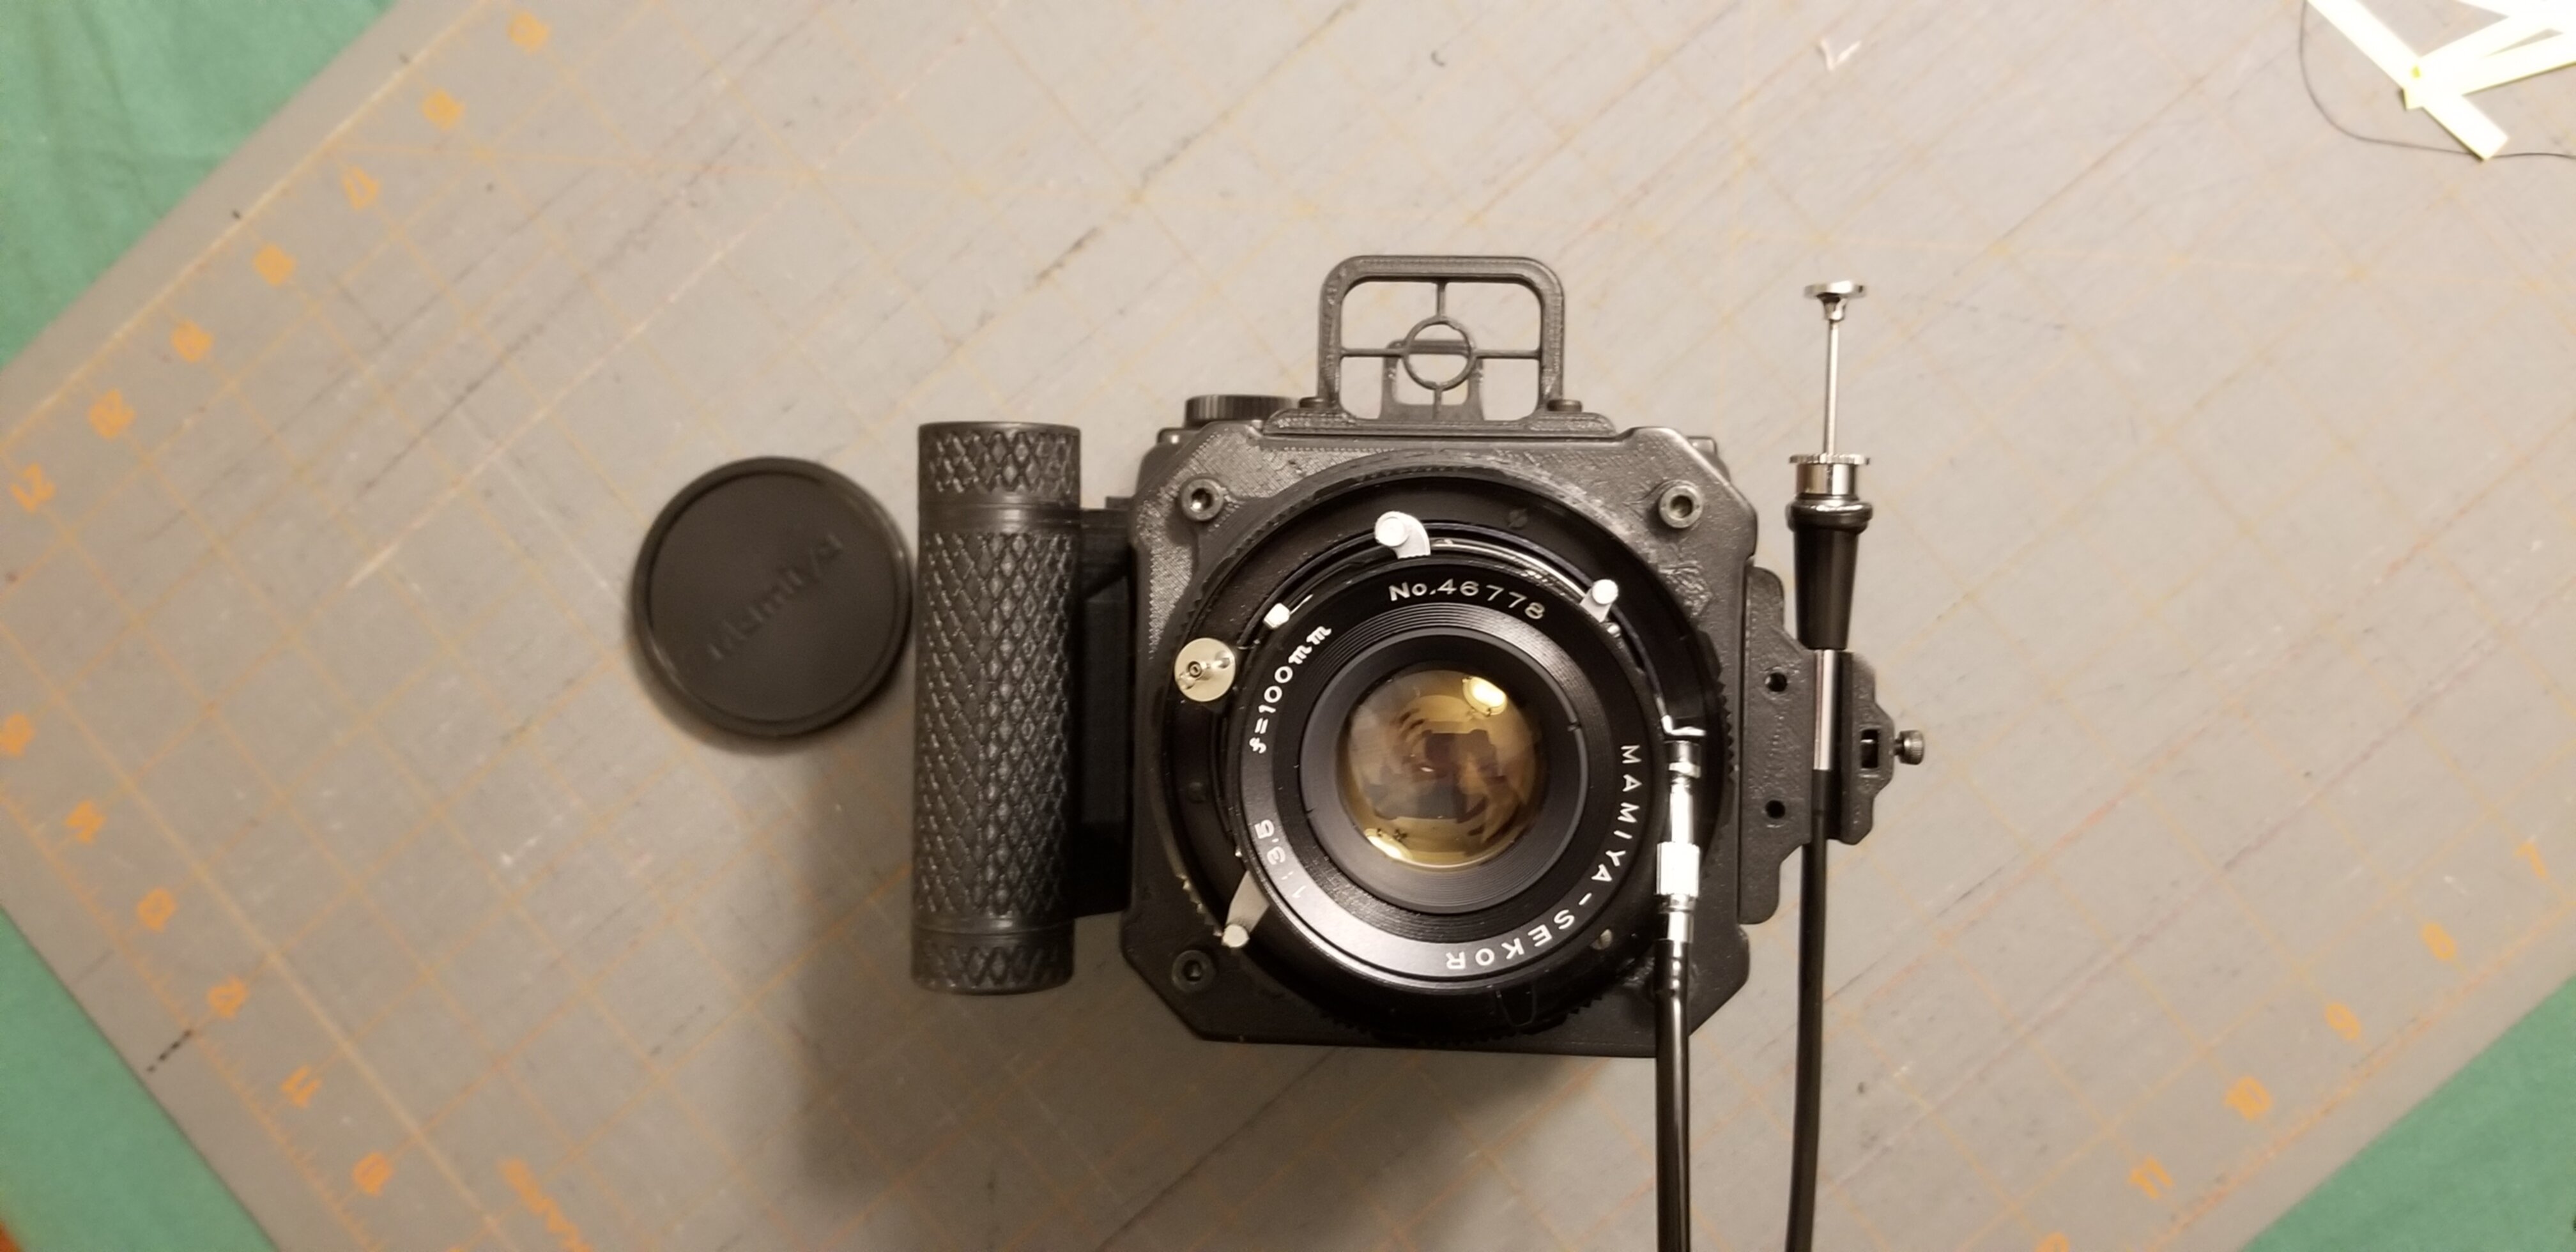
You’ll also have to go on eBay and look for a Mamiya Universal Press Lens, and a Mamiya RB67 back.
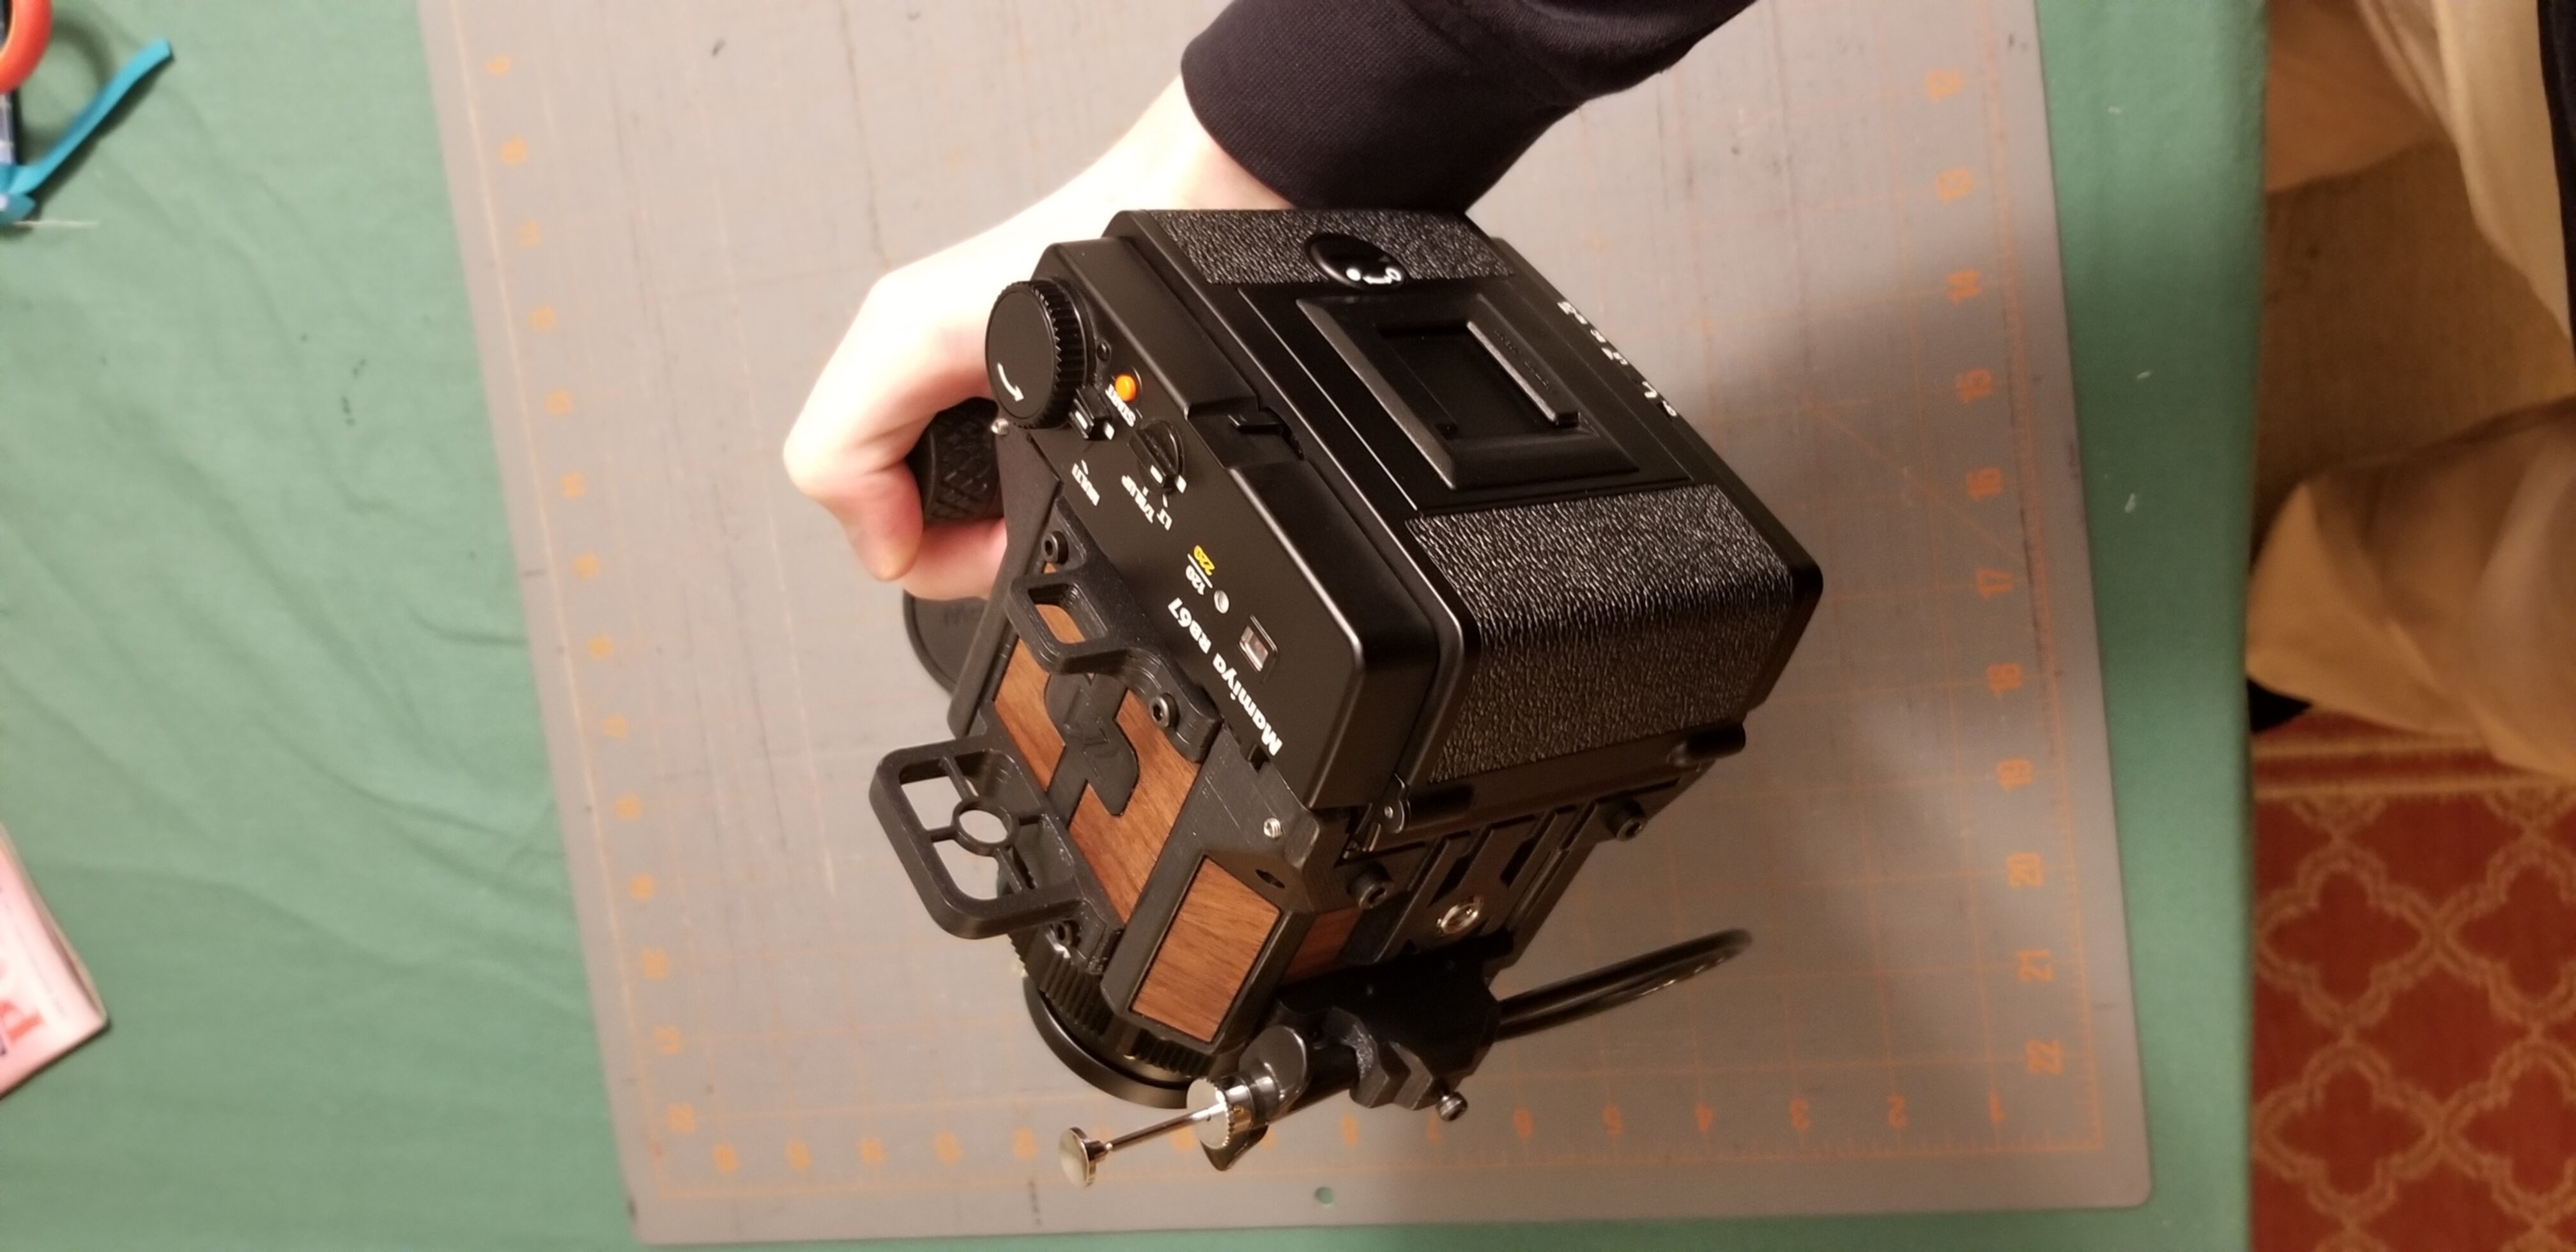
I bought a Pro-SD back instead of a Pro-S back because I found them to be cheaper, more plentiful, and in better condition. If you take this route, be aware it won’t fit the standard body and will require some modifications. I recommend you print the correct modded body from the start rather than retroactively sanding a few millimeters off to make it fit like I did…
I ordered my first lens from Used Photo Pro and was happy with their service. I got the wrong lens out of a noob mistake, but their return process was excellent, and the lens I did receive was in superior condition at a great price.
I later ended up getting a Mamiya Sekor 100mm f/3.5 lens.
Assembly
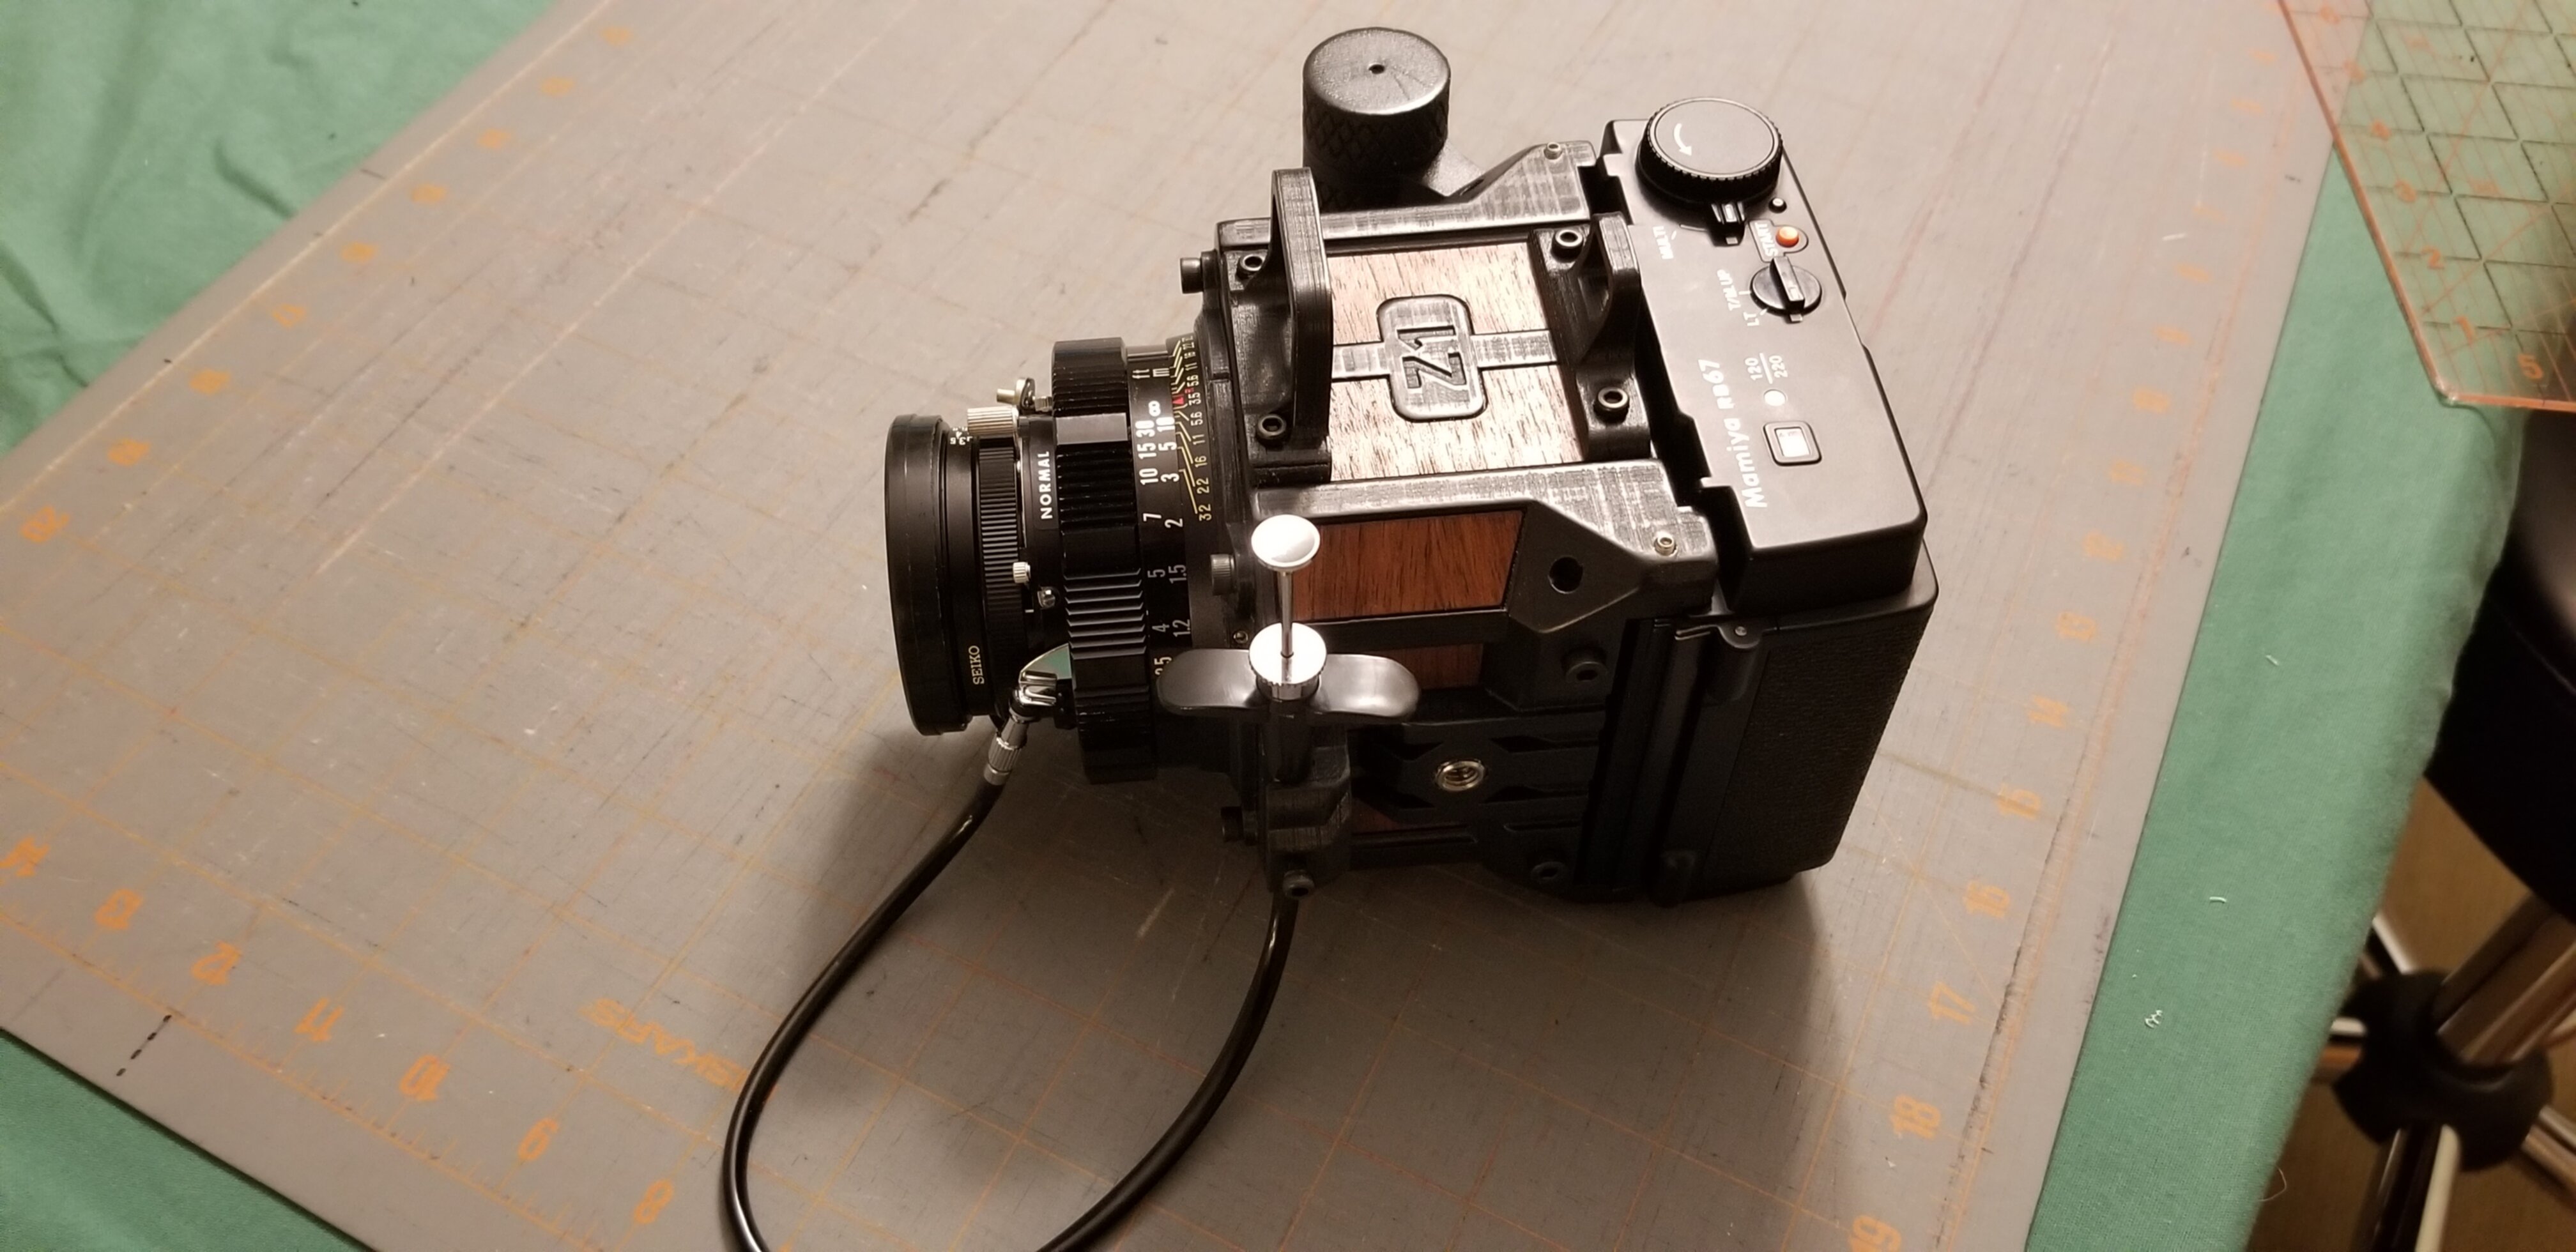
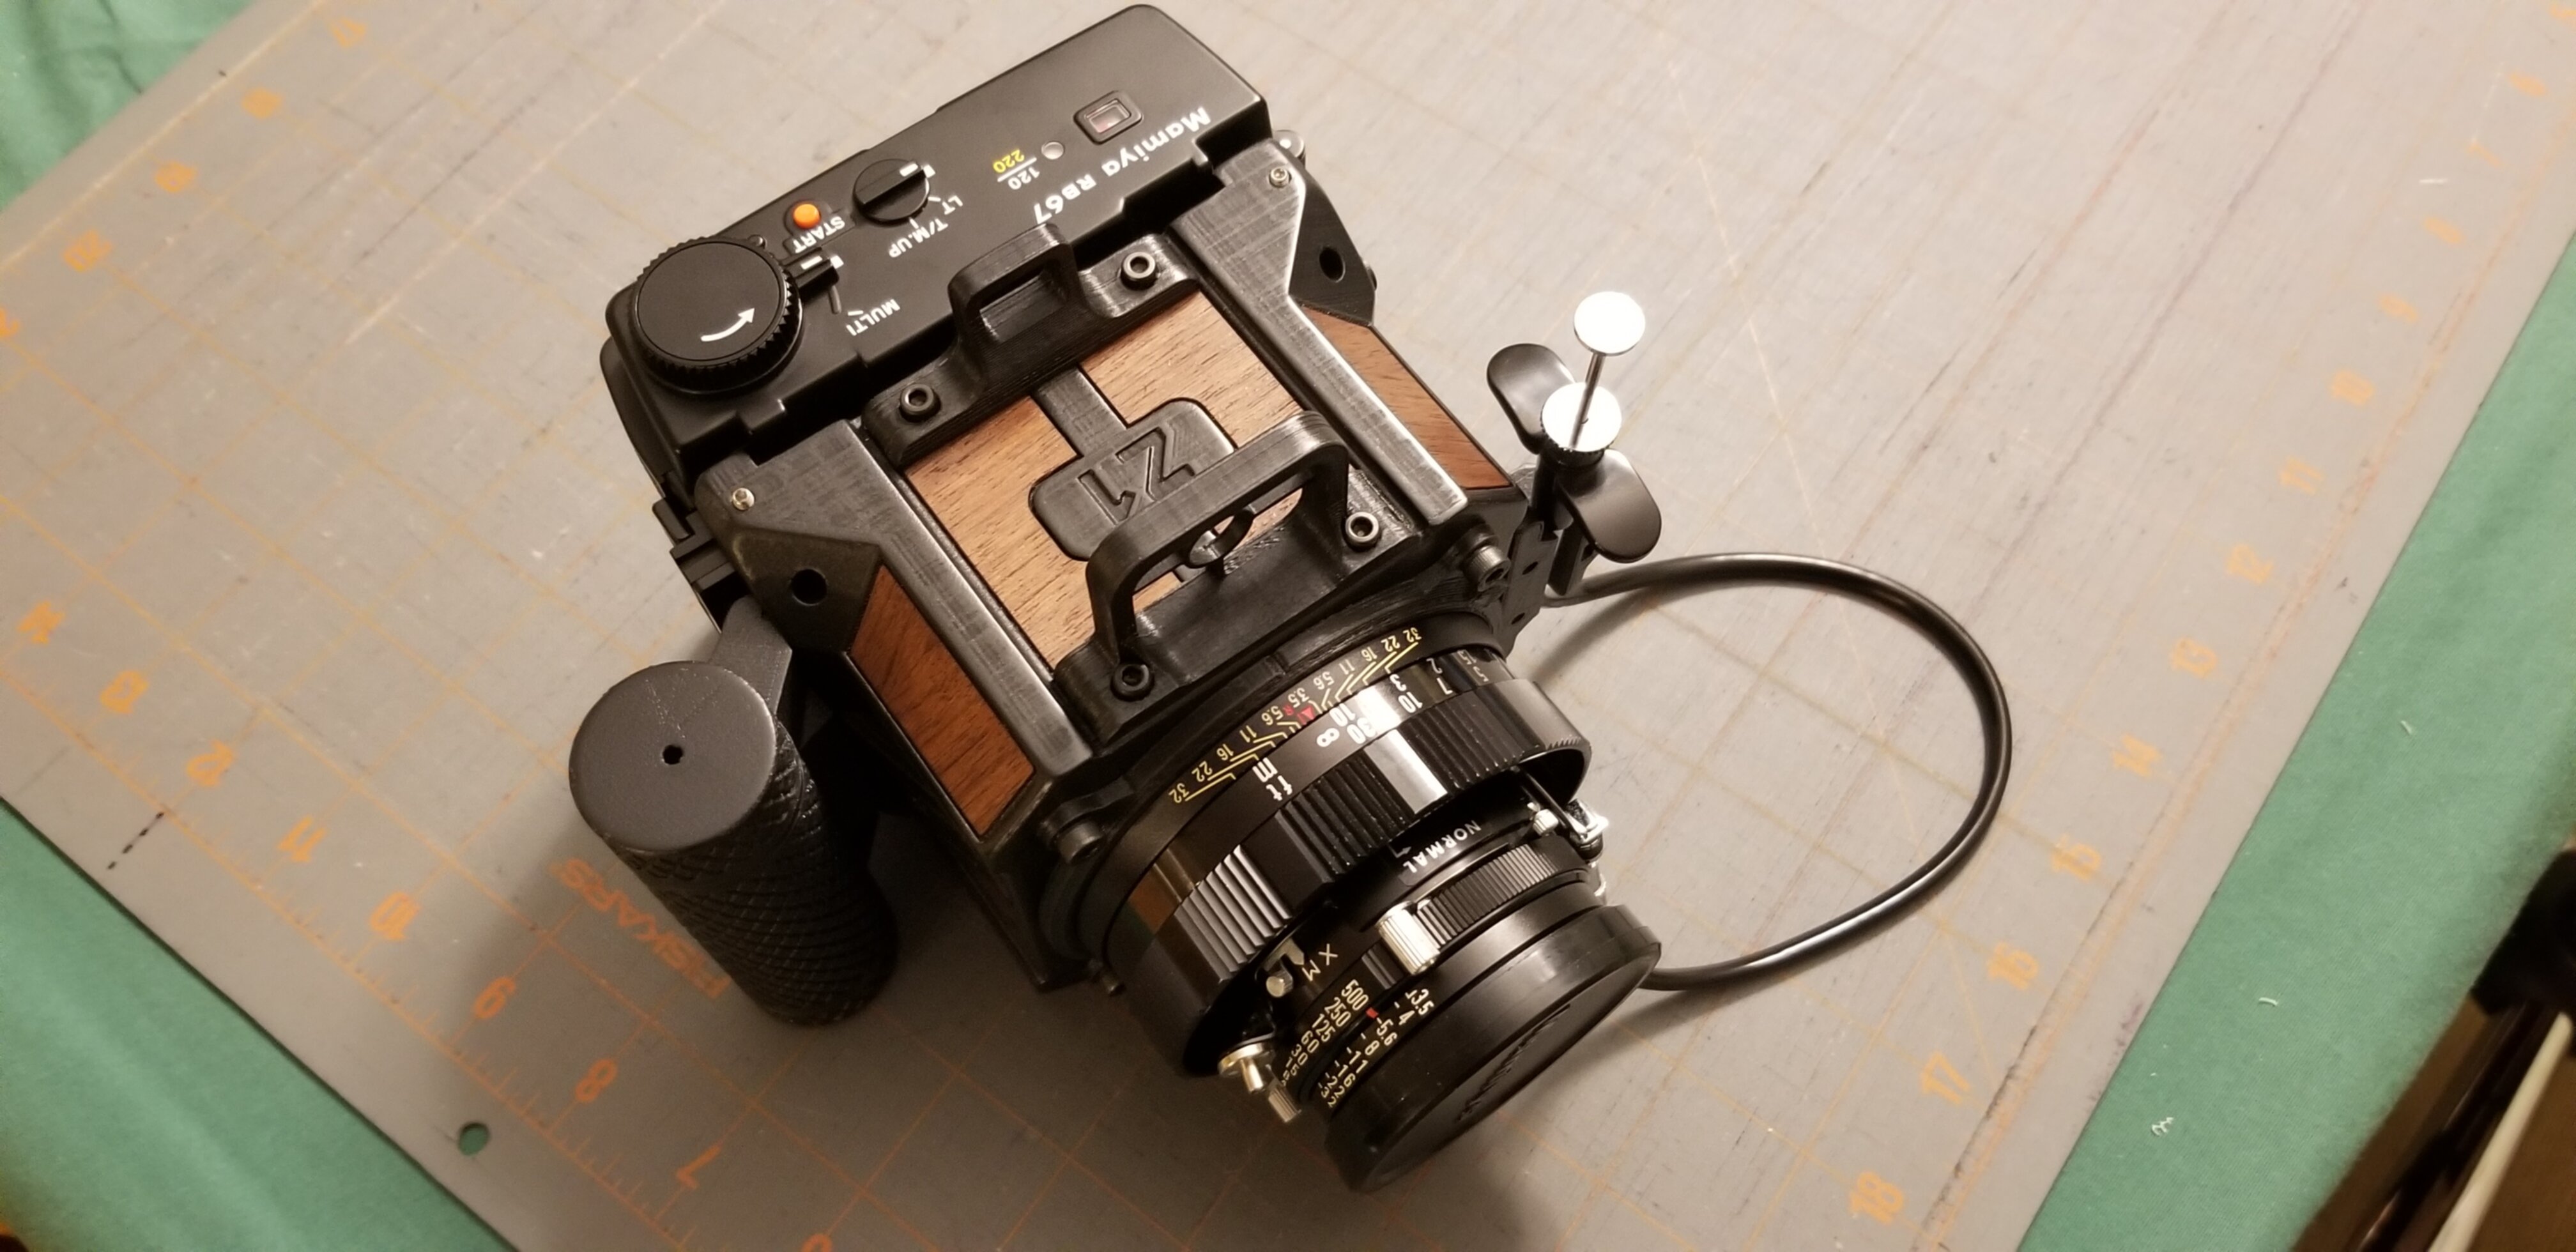
Getting the metric components is honestly the hardest step. After I printed my parts, I sanded for a few hours. I used PLA plastic and found 400 grain sandpaper worked the best between the 100, 400, and 900 grains I had available.
I used Dora’s provided SVG to cut the decorative wooden panels on my dad’s laser CNC mill. I also had some wood stain on hand, and I wanted a richer color out of my veneer, so I lightly sanded (to remove any splinters) then stained it. The veneer has a 3M adhesive backing, so you can stick it right onto the body.
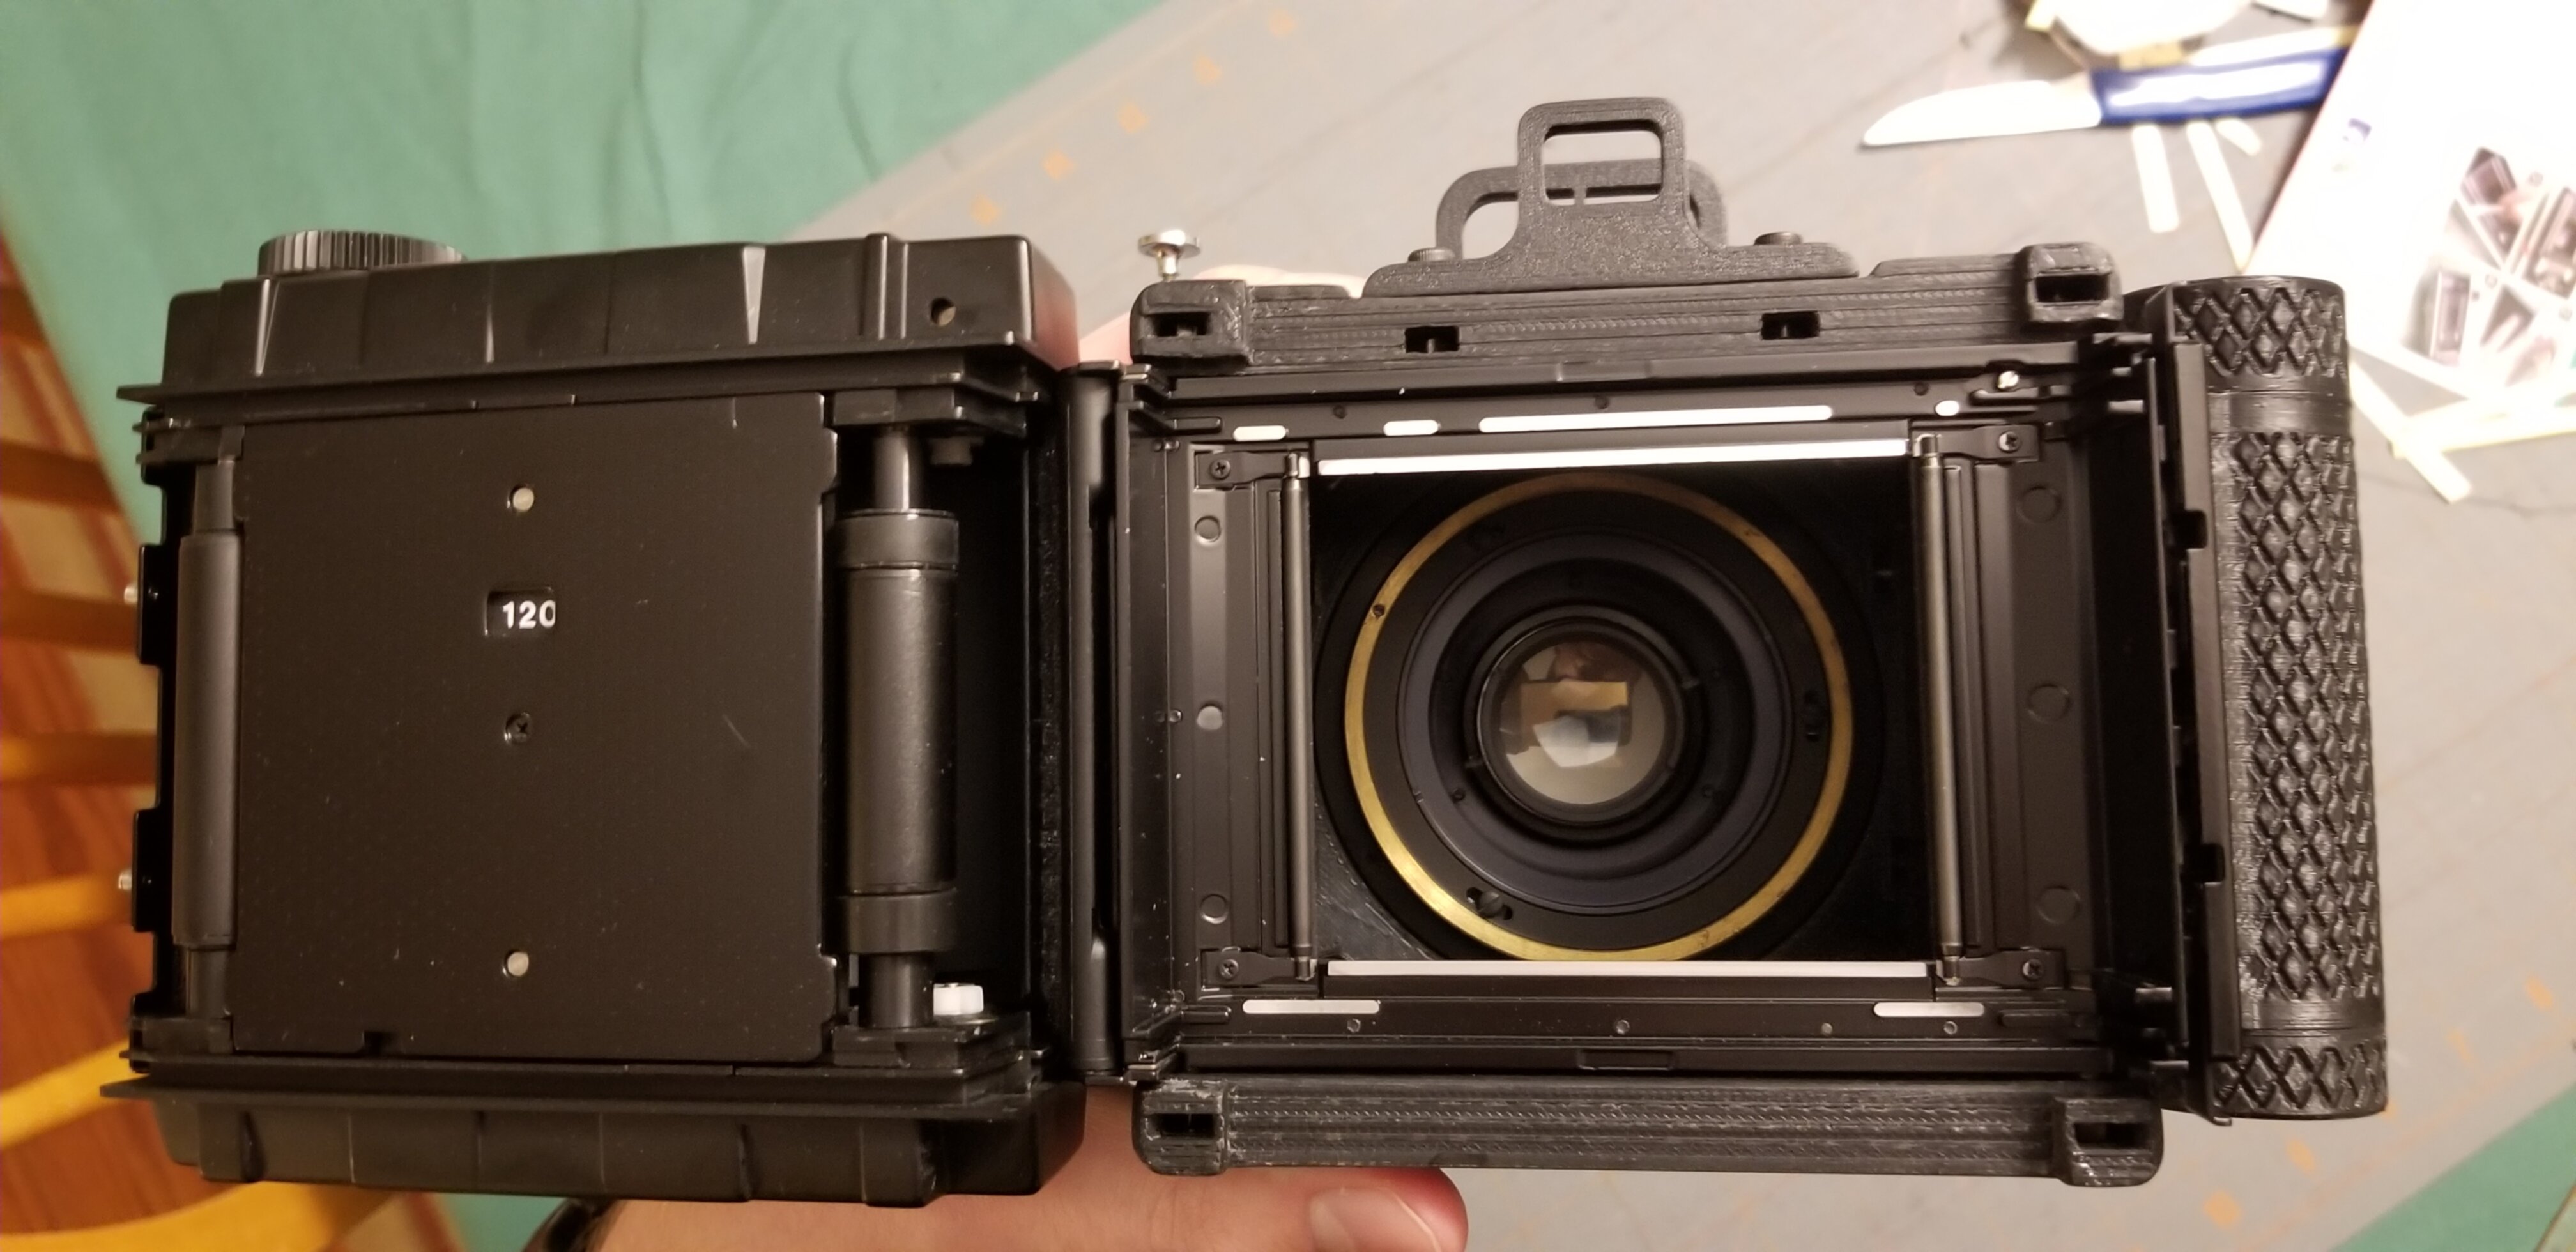
After I put the veneer panels onto the body, I coated each part in acrylic spray paint to protect it. Finally, I followed Dora’s assembly instructions:
You’ll want to use your light seal foam to surround the film back enclosure on the body; if light gets in it will ruin all your shots with the same effect.
The final touch is the shutter release which simply screws into the lens. It gives off a nostalgic vibe while being quite functional.
Final Product
I took some pictures with a roll of ISO 100 Kodak 120mm film my brother-in-law gifted me. Due to COVID-19, I have yet to develop it (he has the kit), but I will post those pictures when that happens.
I’ve been learning about light management too. Since this is not a digital camera and it doesn’t have a viewfinder, you have to do some math to figure out how long to expose your film. You can find a nifty app to do this for you. I found it made the process much easier and enjoyable.